
The original iMac, circa 1998.
People often wonder if when to buy a new computer if their old one is still working. If you have a Mac there are some pretty specific guidelines regarding repairs by the manufacturer and even availability of parts.

The original iMac, circa 1998.
People often wonder if when to buy a new computer if their old one is still working. If you have a Mac there are some pretty specific guidelines regarding repairs by the manufacturer and even availability of parts.
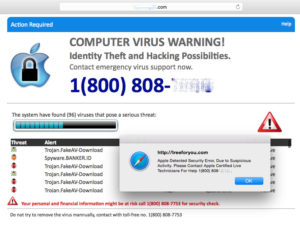
A fake computer virus warning on a Mac
I have had several clients contact me after having responded to a scary notice on their computer screen that said their computer had been hacked and recommending that they call the toll free 1-800 number listed to reach a so-called Microsoft tech support service. Some of these warning screens are accompanied by scary music or tech failure sounds. Many clients gave their credit card number to the fake tech support person at the other end of the call and allowed them to log onto their computer to remove the supposed “malware infection”. In fact, the pop-up notice was itself malware, which is why it wouldn’t go away. In most cases the fake tech support people then fix a lot of problems that don’t exist in exchange for several hundred dollars worth of “protection” for one year. It reminds me of the Mafia’s old protection racket. A gangster would visit every retail small business in the neighborhood and offer them protection services for a monthly fee, with the warning that if they didn’t pay up, “something terrible could happen”. It was a thinly veiled threat in the guise of a helpful warning. And of course, if the business owner didn’t agree to the protection, terrible things did happen.
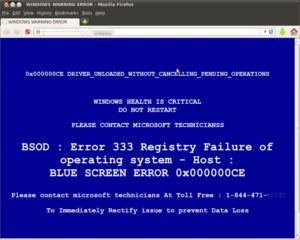
A fake computer crash warning on a PC
Please, don’t fall for it. If you get one of those scary pop-up notices, call a bona fide computer support specialist, not the 1-800 number on the computer screen at that moment. If you did fall for it, first call your credit card company and ask them to cancel the charge. They will probably understand very quickly, as this type of scam is well documented. Second, call us or another tech support company to help purge your computer of any software the fake tech support person installed on your PC or Mac. (Yes, this scam can affect Macs too). You’ll probably come out of the experience with all your precious data intact and all the bugs removed from your computer. You’ll also be wise to the scam, in case it ever happens again.
Note: This scam is different from a “ransomware attack”, which is discussed in a previous article on this site.
 Here are some interesting facts about the Internet:
The whole Internet is estimated to have 4.65 billion pages. — Source: http://www.worldwidewebsize.com.
Google now processes over 40,000 search queries every second on average, which translates to over 3.5 billion searches per day and 1.2 trillion searches per year worldwide.
— Source: http://www.internetlivestats.com/google-search-statistics.
I remember when the World Wide Web was just getting started, back in the early 1990s. Its growth rate has been, and continues to be, phenomenal.

The Ask search page
One day your web browser suddenly opens to an Ask.com search page instead of your favorite homepage. What happened? You probably updated Java but didn’t opt out of changing your search engine and homepage to Ask.com. There is a screen just before you click the last “Next” button that has two little check boxes. You have to click in each box to deselect them.
Okay, so now you know how to prevent it next time, what do you do this time to get your homepage back to where you like it? Changing the homepage depends upon which browser you use.
In Microsoft Internet Explorer:
Open Internet Explorer by clicking the Internet Explorer icon on the taskbar.
Click the Tools button, and then click Internet options.
On the General tab, under Home page, enter the URL of the site you want to set as a home page.
Click Apply, and then tap or click OK.
For more information see:
Changing Internet Explorer homepage
In Mozilla Firefox:
Open a tab with the web page you want to use as your home page.
Drag and drop that tab onto the Home button.
Click Yes to set this page as your home page.
For more information see:
Changing Mozilla Firefox homepage
In Google Chrome:
It’s a bit more complicated in Chrome, but here are the instructions:
Changing Google Chrome homepage
In Apple Safari:
You can set any webpage as your homepage, and have it shown when you open a new window or a new tab.
Choose Safari > Preferences, then click General.
To set your homepage:
Enter a webpage address in the Homepage field, or click Set to Current Page to use the webpage you are currently viewing.
To open new windows with your homepage:
Click the “New windows open with” pop-up menu, then choose Homepage.
To open new tabs with your homepage:
Click the “New tabs open with” pop-up menu, then choose Homepage.
To quickly open your homepage:
Choose History > Home.
Source: Safari 8…Set Your Homepage
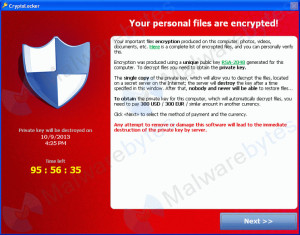
CryptoLocker Ransomware – If you see this on your computer screen you are in trouble.
Of all the computer viruses I’ve seen in nearly 20 years of helping people with their computers, none is nastier than what is known as “ransomware”. There have been several variations, starting with a virus called Cryptolocker. Later versions were called CryptoDefense and CryptoWall, just to name a couple. They use a powerful kind of encryption to render all of your personal files impossible to open without the encryption key. They ransom that key to the owner for as much as $1,000 US, but that could go up at any time. To increase the urgency of paying the ransom, they warn you that if you don’t pay within a day or two, the “fee”doubles in cost. If you miss the last deadline they say they destroy the encryption key.
Unlike other viruses, removing the virus does not restore access to your files. Unless you have the files backed up to an external source – either a drive not connected to your computer since getting the virus, or online backup (in “The Cloud”), your files are gone. Of course you could pay the ransom, but there is no guarantee that you will get the encryption key in exchange, since you are dealing with crooks. Many people have reported paying the money and not getting the encryption key, or it not working. Obviously, the crooks are not big on technical support.
Besides having a good, up to date antivirus program on your PC, the best defense against threats such as ransomware is to have a reliable, automatic and frequent backup program running, preferably one that keeps prior versions of changing files. We have discussed automatic online backup services in an earlier post. There is no substitute for good, frequent backups. In the case of ransomware, it’s not only the best defense, it’s often the only defense. If you back up to an external hard drive that is connected to the computer after you get the virus, your backed up files will also be inaccessible.
Once the virus is removed, if you are lucky you may be able to recover some or even all of your files, provided your operating system is Windows Vista, 7 or higher. Removing the virus is a fairly advanced technical feat, but one which is outlined in a video on YouTube.com. If you have Windows Vista or later you may be able to recover an earlier version of the file through a Windows background feature called Shadow Copy, although later variants of the virus may delete the Shadow Copy backups, as well as System Restore points. Again, the best defense against this type of virus is to have good and frequent backups. If your backup drive is connected to the computer at the time of your infection, all the files on the backup drive may be encrypted as well. That’s why online backup in addition to local backup is so important.
Besides having a good and up to date antivirus program on your PC, I recommend using “second opinion” antivirus software such as SurfRight’s Hitman Pro. This does not conflict with your main antivirus software, and it may catch infections that the primary program misses.
The image below is a screen shot of the CryptoWall ransomware instructions for paying the perpetrators through Bitcoin. Paying it is not a good idea.
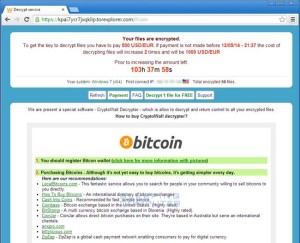
The CryptoWall ransomware page.
 With Microsoft no longer releasing security updates and patches for Windows XP as of April 8, 2014, a lot of clients and friends have been asking me for my advice. They have two questions: 1) “Is it still safe to use Windows XP?” and 2) “Should I upgrade Windows XP to Windows 7 or 8?”. So partly to save time and partly because this blog is supposed to be a font of useful computer information, here is my advice:
1) Is it still safe to use Windows XP?:
It has been never been as safe to use XP as it has to use Windows 7 or later since Windows 7 came out. Research shows that XP has fewer security measures built into it than 7 and 8. As of April 8th it becomes even less secure. Until then, as soon as possible after a security hole was discovered in XP, Microsoft’s engineers would release a Windows Update patch that would plug the hole. That has been going on since the system was first introduced in 2001. Yes, it’s about 13 years old, which in computer technology time is several lifetimes. But come April 8th, no further updates will be released, according to Microsoft. So if some hack gets revealed on April 9th, any computer running Windows XP that is connected to the Internet will be vulnerable to it. Does that mean you’ll get hacked immediately? Probably not, but who wants to be the bait?
2) Should I upgrade my computer to Windows 7 or 8?:
Bottom Line: I recommend getting a new computer.
Here’s why:
There is no direct upgrade path from XP to 7 or 8. That means you cannot do the usual kind of “in-place install” upgrade where all your programs, documents and settings are still there when you finish. Instead they MAY get deleted when you upgrade, or moved to a folder called Windows.old (see below). That means you have to first back up everything to an external drive (though you can use Windows Easy Transfer Wizard for that, it still may take up to an hour or more), do the upgrade install, then restore your documents and settings and (and this is the real time eater) REINSTALL ALL YOUR APPLICATIONS. For that you’ll need the original installer disks or downloaded the installer files from online, along with the product Activation Keys or Serial Numbers to be able to use the programs for more than a brief trial period. With all that and running all the Windows Updates it could easily be a three or four hour job, if not more. In the end you’ll still have old hardware running a more recent operating system, inevitably slower than new hardware would. All those things considered, I recommend buying a new computer.
As long as your old computer still works, you could install Windows 7 or 8 on it and use it as a backup machine, in case your newer computer has to go out for repairs, or if you have a guest or kids that you don’t want touching your main computer. You’ll just have to buy Windows 7 or 8 and run the upgrade, which will delete your personal data*. Incidentally, that’s not a secure deletion, so this path wouldn’t make security sense if you were going to give the machine away or sell it. In that case you should do a secure wipe of the computer first, using software you boot from an external disk that will write over the data on your hard drive with random zeroes and ones. Then you can install Windows and not worry about who might wind up with the computer someday.
—-
*If you run the Windows 7 installer as a program while you are in Windows XP, and do not choose to format the C: drive partition, your old files and settings will be moved to a folder called Windows.old. After a couple of weeks if you are sure that you have recovered everything you need from your old Windows XP installation, you can delete this folder. Microsoft recommends deleting using the Disk Cleanup utility:
Post-install clean-up (optional)
WARNING–Before you use Disk Cleanup, make sure that all of your files and settings moved correctly to Windows 7 where you expected them to be. Deleting the Windows.old folder can’t be undone.
1. Click the Start button, and in the search box, type Disk Cleanup. In the list of results, click Disk Cleanup.
If you’re prompted to choose a drive, choose the drive you just installed Windows 7 on, and then click OK.
2. Click Clean up system files. If you’re prompted for an administrator password or confirmation, type the password or provide confirmation.
If you’re prompted again to choose a drive, choose the drive you just installed Windows 7 on, and then click OK.
3. Select Previous Windows installation(s) and any other categories of files you want to delete.
4. Click OK, and then click Delete Files.
© 2009 Microsoft Corporation. All rights reserved.
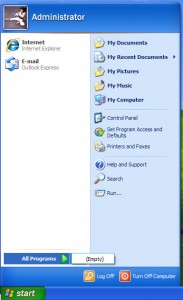 Sometimes after removing a computer virus from a infected Windows PC it looks as though all the user’s documents and programs are GONE. This can cause a panic for the user, not to mention the unseasoned technician. Usually nothing is actually gone, the apparently missing items are just hidden. Here’s a simple fix if this happens to a Windows XP machine:
1) Go to the Start button (if you can see it). Click My Computer. If you can’t see my computer, push the Windows Flag key (between the CTRL and ALT keys at the lower left of the keyboard) and the letter R at the same time. In the Run box that opens up, type “C:\” (without the quotation marks). Click Okay.
2) Click the Tools menu at the top left of the window. Then click on Folder Options.
3) Click the View tab. Under Files and Folders/Hidden files and folders check the radio button for “Show hidden files and folders”, then click the Okay button at the bottom.
4) Right-click the Documents and Settings folder. Choose (left-click) Properties.
5) If Hidden is checked, uncheck it and click Apply. When the dialogue box comes up check Apply changes to this folder, subfolders and files, then click Okay.
6) During the progress bar for applying the changes if you get an “Error Applying Attributes” message, click Ignore or Ignore All. When the process is finished click Okay.
7) Repeat steps 2 and 3, but this time check the button “Don’t show hidden files or folders” (unless you want the normally hidden files and folders to be visible).
Voila! The “missing” programs, documents, desktop icons, folders and files are back as they were before the virus.
In Windows 7 it’s a bit more complicated. If you have that problem, please contact us for help.

One of the most important things you can do for your peace of mind and security is to back up your computer’s data. Most people don’t care or even think much about backing up, until something goes wrong. At that point everyone cares about restoring what is lost, but of course, if you didn’t back it up you’re pretty much out of luck.
What is your data? Anything stored on your computer – documents, pictures, music, video, projects, etc, are what we call your data. It includes your personal data and your business data. You may also have downloaded programs that you don’t have on a CD or DVD, and cannot download again. Besides backing up your data, it’s a good idea to have a “clone” back up of your whole computer, so if the hard drive fails you can replace everything without having to reinstall from scratch. (That saves a lot of time!).
What could go wrong? All the data on your computer is stored on a fallible piece of hardware called a hard drive. The most common type of hard drive has mirror-finished silver metal platters that spin at speeds up to 7,200 RPM. A metal armature with an electromagnetic tip goes back and forth across the spinning platters reading and writing data in milliseconds. If that hardware gets bumped while it is reading or writing, it can damage either the armature or the platters themselves. Then there is the motor that makes the disks spin and the armature move, and an electronic circuit board called a controller that manages all the activity of the drive. Unfortunately for consumers, any of those parts can fail at any time. Several years ago most hard drives came with a warranty against defects for up to five years. Today most of them come with only a one year warranty. The hard drive manufacturers know the odds that their drives will fail. They figure that one year is a safe bet, but they don’t want to have to cover two years or more. There are some more expensive drives that come with a two, three or even five year warranty, but bear in mind that even if you get a free replacement for the drive, that doesn’t include replacing your lost data. Even the latest solid state drives, which have no moving parts, are still not infallible.
What does backing up mean? Basically it means having your data stored in more than one place. That way if one of the storage media fails, or if you accidentally delete something essential, you can restore it from the other place. The “place” can be a different hard drive, flash drive, or even CD or DVD on site, or it can be at another location. The other location could also be in “the cloud”, which just means on a computer, or server, somewhere on the Internet.
A portable, external hard drive (USB 3.0, 2.0, Firewire or eSata) is an inexpensive, fast option for a local backup. Lately I’ve been using WD Passport Essentials drives, but there are other good options such as Seagate’s GoFlex drives, Hitachi’s G-Drives, and LaCie drives. Try to get one with the longest warranty available. That usually indicates better drive quality.
There are different types of backups. The one major distinction is where to store the backup – “locally”, on a hard drive attached to or wirelessly accessible from your computer, or “in the cloud”, which is a remote backup to a server somewhere on the Internet. Both are important. Local drives allow you to restore large amounts of data much faster than from an online backup, but remote or cloud backups are safer because they are off the premises. No matter what happens to your computer, the off-site backups are there. We recommend doing both.
Backing up should be more or less automatic. If you have to think about backing up too much, and remember to do it regularly, you probably won’t. Most external hard drives of 100 GB or more come with free software for automatic backups. But you still need to install and run the software.
Your Very Own Time Machine. Fortunately for Mac users, Apple has for the past few years included a terrific automatic backup program with the Mac OS X operating system. It’s called Time Machine. As soon as you plug in an external hard drive – whether it has a USB, Firewire or other type of connector, Time Machine recognizes its presence and asks if you want to use that as your Time Machine Backup drive. If you click yes, it will start backing up your computer to it in a couple of minutes. When it has copied your hard drive’s contents, it will do periodic updates to the backup every hour, day, week and month. When the backup drive runs out of space, as eventually it inevitably will, Time Machine will delete the oldest backup to make room for the current state of your computer. It doesn’t delete anything that is still on your computer from the backup, but if you deleted a file or folder, let’s say three months ago, when Time Machine needs more space it will no longer retain that deleted file or folder. The idea is to keep your backup up current, and to keep as many previous versions as you have space for on your backup drive. With Time Machine, you just have to be sure your backup drive is plugged in to your computer whenever you save something new on it, or update an older file. (One caveat: don’t even think about manually deleting the old backups from your Time Machine drive. They are needed to keep the whole backup system intact, since older data is only really backed up again if it changes. Otherwise what look like multiple backups on the drive are really just aliases pointing to the real data).
If you are a Windows PC owner, recent versions of the Windows operating system also have a built-in backup program, but you have to set it up. There are also backup programs that come with just about all of the most popular external hard drive brands, like WD, Seagate and LaCie. Sometimes they have a free version and a premium upgrade option.
Online Backup Services. There are many good online backup services. They all come with their own software, which automates the online backup and updating process. I recommend CrashPlan, Backblaze or Carbonite. They all have PC and Mac versions.
Most of the online backup services, including ibackup.com, will ship the user an empty hard drive with instructions on how to “seed” it with your first backup. If your hard drive has more than 100 GB of data on it, this is the only practical way to start out. If you are not technically inclined, you can hire someone like us to set this up for you. We can start the copying in person or remotely and then you let us know when it’s done and you are ready for the next step. Some services charge a fee for shipping you the seed drive to load up with your data and return. Others include it in the price of a year’s service.
Another great feature of the best online backup services is that if you do have a monumental hard drive failure or other local disaster, they can express ship you a hard drive with all your data on it. That makes recovery much faster than if you had to download everything from the Internet. Prices for this service vary by vendor.
Archiving Data. One more thing about backing up. If your hard drive gets too full, you may want “archive” some data, which means moving it off your computer onto an external hard drive. Just be clear that archiving is NOT the same as backing up. You still need to backup your archive, in case something dire happens to that storage medium. Again, the simple rule of thumb is that if your data isn’t in at least two places, you risk losing it. When it comes to backing up, redundancy is good. Having your data stored in more than two places, with one of the places preferably being off-site, is much better than only two.
Some Backup is Better than None. Whether you just do local backup, online backups, or both, the main thing is to be sure that your data is backed up SOMEWHERE that is safe, reliable, and easy to access. You can even put your most important documents on a flash drive and store it with a friend across town. However you decide to backup, do it often. That major addition to your novel you wrote today won’t be in the backup you did last night.
Trust but Verify. It is very important to TEST your backups from time to time. Don’t assume that everything is working. Pick a file at random and restore it from the backup, just to make sure you can. If you have a mirror backup or “clone” drive, try starting up from it once a month.
Okay, I didn’t back up and now the hard drive doesn’t work. Is there any way to recover my data? Yes, data recovery companies like Drive Savers have industrial grade clean rooms where they can take apart your drive and put the platters on another drive to recover some or all of the data. But that meticulous process comes at a a high price. The minimum charge is usually about $1,000, and it can go much higher, depending on how much data you have to recover, and how much they are able to read from the disk. That makes it a no-brainer: would you rather spend $100 to $200 for a backup drive and software or $1,000 and up for emergency data recovery? Backing up is definitely the better investment, from an emotional as well as a financial perspective.
If you’d like help choosing a backup solution, give us a call. Like insurance, backing up is what you want to think about before disaster strikes, not after.

The CompTIA Certified logo
For most people, their computer and their data is as vital to their daily lives as their telephone and bank account. Recently I have heard several horror stories from new clients about incompetent and/or unscrupulous computer technicians. Currently, at least in New York State, there is no licensing requirement for a computer tech. Having recently passed certifications for both PC and Mac, I can tell you that if someone passes those rigorous tests, at least they have adequate knowledge to do a good job. Being certified doesn’t mean a technician has the answer to every computer question or problem – no one does. Part of what training and experience teaches you is how to recognize when you need more information, and where to find it. A person who has passed the certification exam should have a good idea of what they need to know to service your computer.
Of course there is no test for honesty, except perhaps the marketplace and the courts. I strongly recommend that if you are in the market for a computer tech to come into your home or business, look for someone who is certified, and preferably someone with several years’ experience. The industry standard basic PC tech certification is called “A+” and is granted by the Computer Technology Industry Association (CompTIA). For Mac service, the Apple Certified Support Professional certification is granted by Apple. The status of both certifications for any individual can be verified on the respective web sites.
For protection from unscrupulous technicians, there’s nothing like a customer referral. Ask for some client references you can contact by phone or email, and check with them before you hire a new technician.
I did computer support work for seventeen years before becoming certified. I knew I was giving honest, capable service, but not everyone out there is like me. If there had been a state law requiring certification, I would have taken the exams long ago. Sooner or later, I predict that such licensing will be required, as more customers experience the difference between competent, trustworthy service and getting taken for a nightmare ride. Meanwhile, caveat emptor!

Two Things to Do Before Hiring Tech Support
It’s amazing how many computer problems can be solved by just a few simple steps. We’d love to have your business, but in all fairness, you can probably save time and money by trying these steps before you hire us or anyone else to fix your computer. We lead our clients through these steps over the phone, and when they solve their problems it seems miraculous to them. Actually, it’s very logical and scientific. NOTE: It might be wise to print this section out for future reference (PDF). If you only have one computer, or you can’t get to the Internet, you might not be able to access this in a crisis.
A. General Computer Problems
1) RESTART (also called REBOOT): It’s amazing how many problems disappear just by restarting the computer. Error messages on the screen like “Not enough memory”, frozen programs or a frozen or endlessly spinning cursor, strange characters in documents, and no Internet connection (wired or wireless) often disappear with a restart. Restarting does not mean just closing the lid on a laptop and then opening it.
To RESTART: In Windows Vista or 7, click the Windows orb button ![]() in the lower left corner of the screen, then click the little right-facing triangle (arrow) next to “Shutdown”, and click on”Restart”.
in the lower left corner of the screen, then click the little right-facing triangle (arrow) next to “Shutdown”, and click on”Restart”.
In Windows XP, click the START button in the lower left corner of the screen, then click “Shutdown”. A window will come up with three buttons, one yellow, one red and one green. Click on the green “Restart” button. Then be patient, as the computer should gradually shutdown and start up again.
2) On a Mac, click the Black Apple icon ![]() in the upper left hand corner of the screen, move the cursor to Restart and release the mouse button. If the Mac orb
in the upper left hand corner of the screen, move the cursor to Restart and release the mouse button. If the Mac orb ![]() has turned into a spinning ball that just keeps on spinning for a couple of minutes, you may have to “Force Quit” an application, or even force the computer to shutdown. To Force Quit, push the keys Command, Option and ESC (Escape) all at the same time. In the “Force Quit Applications” window that comes up on your screen, select the program you were just working in from the list, click on it, and click the blue Force Quit button. Usually that will free the cursor, turning it from a spinning ball back into an arrow.
has turned into a spinning ball that just keeps on spinning for a couple of minutes, you may have to “Force Quit” an application, or even force the computer to shutdown. To Force Quit, push the keys Command, Option and ESC (Escape) all at the same time. In the “Force Quit Applications” window that comes up on your screen, select the program you were just working in from the list, click on it, and click the blue Force Quit button. Usually that will free the cursor, turning it from a spinning ball back into an arrow.
If the Force Quit doesn’t work, try restarting again. If you cannot, find the Power button (the one you push to turn on the computer), push and hold it down until the computer shuts down completely. That will usuall happen in about 20 seconds or less. Wait about 30 seconds for the hard drive to spin to a halt. Then push the power button to restart the computer.
3) On a Windows PC, if the cursor is staying as a spinning circle or hourglass icon, the PC force quit is to hold down the Control (CRTL), Alt and Delete (DEL) keys simultaneously. This brings up the Task Manager window, or a list from which you can choose Task Manager. Under the Applications tab at the left of the window you will see a list of programs. Click on the program you were working in when the cursor got stuck and click the End Task button. If you get a warning saying you will lose unsaved changes, click continue anyway. At this point you have no real option to save your changes because the program has already crashed.
4) If the End Task option in the Windows PC fails to solve the problems, you might be able to restart from the Windows orb button or the START button. If not, hold the power button down until the computer shuts down. Wait about 30 seconds for the hard drive to spin to a halt. Then push the power button to restart the computer. (If you read the Mac instructions above, you can see how similar Windows and Mac computers are these days).
B. Internet Connection Problems
If your web browser tells you it cannot find a web site that you know is there, you may have lost your Internet connection. If your computer is a laptop or you have a wireless connection on your desktop, check the wireless icon and be sure you haven’t inadvertently turned off the wireless adapter.
Losing your Internet connection is often due to a temporary problem with the signal from your Internet Service Provider (ISP) that might require REBOOTING the cable, DSL or Fios MODEM, and the ROUTER (if you have a separate router – you might not). In general here is the step-by-step to restore the Internet connection:
1) Locate the power cord that goes into the back of the modem (that’s the box that was provided by your ISP. It’s usually round and black. Gently pull it out. If there is a latch holding it in place, squeeze the latch in to release it and gently pull the cord out. Set the cord under one of the “feet” of the modem so it won’t slip behind your desk, and so you won’t get the different power cords mixed up. They may have different voltages, so be sure you keep the right cord with the right device.
2) If you have a separate router that connects the computer to the modem, locate and unplug the power cord from the router. Again, it’s usually round and black.
3) Wait about a minute or two.
4) Plug the modem’s power cord back into the modem. The LED lights will go through a reboot sequence. You may see one light blinking, then two, then three, then four, and finally, for a moment, five. Very quickly after they are all flashing in unison, some will go out and others will start blinking. If it’s a DSL modem, you will see one or two lights blinking slowly at first, then rapidly, but in very regular beats. Then at least one of them will start blinking irregularly. That’s when you can proceed to the next step.
5) Plug the router’s power cord back into the router, if you have a router. Wait about a minute until the lights stabilize.
6) Restart your computer. This isn’t always necessary, but it wouldn’t hurt, and might be necessary in some cases.
Note: If you are having to do the steps above frequently, either your modem or router, or both, are probably failing. In that case you should contact your Internet Service Provider for help. If you find it too difficult to deal with your ISP, we can do that on your behalf.
Well, hopefully the steps above have brought you fast relief. If not, give us a call. The number is at the top left of this page.